Enter the ancient art of Gua Sha – a practice that has gracefully transitioned from traditional healing to a beloved modern beauty ritual. If you’ve scrolled through social media or peeked into the routines of your favorite wellness influencers, you’ve likely seen those elegant, smooth stones gliding across faces, promising everything from lifted contours to a radiant glow. But what exactly is it, and more importantly, how can you unlock its magic and learn how to do a gua sha facial massage at home?
Consider this your comprehensive, friendly guide. We’re going to demystify Gua Sha, explore its incredible benefits, walk you through choosing the perfect tool, and provide you with a step-by-step routine that you can seamlessly integrate into your self-care practice. Get ready to transform your skincare routine into a meditative ritual, releasing tension, promoting lymphatic drainage, and revealing the luminous, rested skin you deserve. Let’s embark on this journey to mindful beauty together.
The Ancient Art of Gua Sha: More Than Just a Beauty Trend
While Gua Sha has recently surged in popularity within the Western beauty sphere, its roots run deep into Traditional Chinese Medicine (TCM), dating back thousands of years. The word “Gua” means to scrape, and “Sha” refers to the reddish, petechiae-like rash that often appears on the skin after traditional body Gua Sha, indicating improved circulation. Fear not, facial Gua Sha employs a much gentler touch, aiming for a healthy flush rather than a rash!
Originally used on the body to alleviate muscle pain, release tension, and improve circulation, the principles of Gua Sha were adapted for the delicate skin of the face. The facial version focuses on subtle scraping techniques using smooth, flat stones to gently stimulate the skin and underlying tissues. This isn’t just a surface-level massage; it’s a holistic practice that nurtures your skin from within.
Unlocking the Benefits: Why Gua Sha Deserves a Spot in Your Routine
- Lymphatic Drainage: Our lymphatic system is crucial for detoxification, but it lacks a pump. Gentle Gua Sha strokes help to manually move stagnant lymph fluid, reducing puffiness (especially around the eyes and jawline) and flushing out toxins.
- Improved Circulation: The gentle scraping motion boosts blood flow to the skin’s surface, bringing fresh oxygen and nutrients. This increased circulation results in a brighter, more vibrant complexion and a natural, healthy glow.
- Released Muscle Tension: We hold an incredible amount of tension in our faces – from frowning and squinting to clenching our jaws during stressful moments. Gua Sha helps to relax these contracted muscles, which can soften the appearance of fine lines and wrinkles, particularly around the forehead and jaw.
- Enhanced Product Absorption: By stimulating circulation and gently exfoliating the skin’s surface, Gua Sha can help your serums and oils penetrate more deeply and effectively.
- Sculpted & Toned Appearance: Regular practice can help define facial contours, especially along the jawline and cheekbones, giving a naturally lifted and sculpted look.
- Reduced Appearance of Fine Lines & Wrinkles: By releasing tension and improving circulation, Gua Sha can contribute to smoother, plumper skin, diminishing the visibility of fine lines over time.
- Deep Relaxation & Stress Relief: The rhythmic, repetitive motions of Gua Sha are incredibly meditative. It transforms a simple skincare step into a mindful self-care ritual, providing a moment of peace in your busy day.
Choosing Your Gua Sha Tool: A Guide to Shapes and Materials
Popular Materials: Aesthetics Meet Function
- Jade: Often the most traditional choice, jade is known for its cooling properties. In TCM, jade is believed to promote balance and harmony. It feels wonderfully soothing on inflamed or puffy skin.
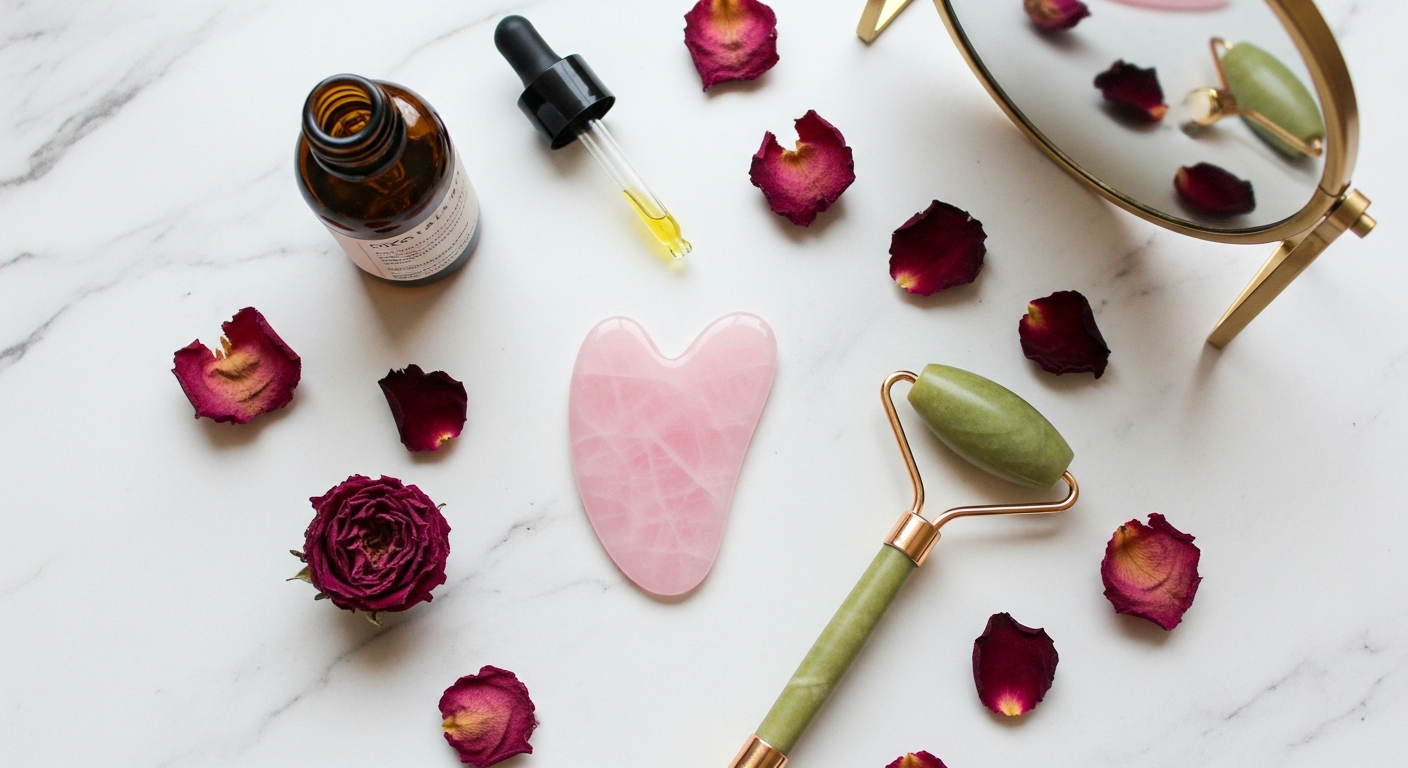
- Rose Quartz: This beautiful pink stone is associated with self-love, healing, and compassion. Rose quartz tends to stay cool longer than jade and is believed to have calming properties, making it a favorite for sensitive or reactive skin.
- Stainless Steel: A modern, non-porous option, stainless steel is incredibly hygienic and durable. It holds a cold temperature exceptionally well, which is fantastic for depuffing. It’s also less prone to breaking if dropped.
- Amethyst: Known for its purifying and calming properties, amethyst is often chosen by those seeking a more spiritual connection with their self-care routine.
- Bian Stone: This is a powerful stone used in TCM, believed to emit ultrasonic pulses and far infrared rays. It’s denser and feels more substantial in the hand.
Ultimately, the best material is one that feels good in your hand and on your skin, and that you’ll consistently use.
Common Shapes and Their Uses: Precision for Every Contour
Most Gua Sha tools are designed with various edges and curves to adapt to the different contours of your face. Here are the most common features you’ll find:
- The Heart Shape (or Wing Shape): This is perhaps the most versatile and popular shape.
- The larger concave curve is perfect for gliding along the jawline, neck, and cheeks.
- The smaller convex curve or pointed tip can target delicate areas like under the eyes or specific tension points.
- The broader, flatter side works well for the forehead and décolletage.
- The S-Shape (or Dolphin Shape): Excellent for hugging the natural curves of the face.
- The “dip” in the S often fits perfectly along the jawline or cheekbones for a sculpting effect.
- The longer, straighter edges are great for the neck and forehead.
- Comb Edge: Some tools feature a textured, comb-like edge. This is fantastic for:
- Gently stimulating the scalp.
- Breaking up tension in the forehead or between the eyebrows.
- Boosting collagen production (use very gently).
When choosing, look for a tool that feels smooth, has no sharp edges, and fits comfortably in your hand. A good quality tool will last you years.
Prepping Your Canvas: Essential Steps Before You Begin Your Gua Sha Facial Massage at Home
Think of your Gua Sha practice as a mini-facial. Just like any good skincare treatment, preparation is key. Proper preparation ensures both effectiveness and comfort, preventing unnecessary friction or irritation.
Step 1: Cleanse Your Skin Thoroughly
Before you even think about reaching for your Gua Sha tool, ensure your face is sparkling clean. This means removing all makeup, dirt, and impurities that have accumulated throughout the day (or night). Use your favorite gentle cleanser and pat your face dry with a clean towel.
- Why it’s important: Massaging your skin with a dirty surface can push impurities deeper into your pores, potentially leading to breakouts.
Step 2: Tone (Optional, but Recommended)
Step 3: Apply a Generous Amount of Facial Oil or Serum (CRITICAL!)
This is arguably the most crucial step in your preparation. You absolutely cannot perform Gua Sha on dry skin. Doing so will cause friction, tugging, and pulling, which can lead to irritation, redness, and even premature wrinkles.
Instead, apply a generous amount of a high-quality facial oil or a rich, slippery serum to your face and neck. You want enough slip so that the Gua Sha tool glides effortlessly across your skin without dragging.
- Recommended Oils:
- Jojoba Oil: Mimics the skin’s natural sebum, suitable for most skin types, including oily and acne-prone.
- Rosehip Oil: Rich in antioxidants and essential fatty acids, great for brightening and anti-aging.
- Squalane Oil: Lightweight, non-comedogenic, and deeply hydrating.
- Argan Oil: Nourishing and moisturizing, good for dry or mature skin.
- Specific Facial Massage Oils: Many brands offer blends designed specifically for facial massage.
- How much: Start with 3-5 drops and add more if your skin starts to feel tacky or the tool isn’t gliding smoothly. Your skin should look visibly hydrated and glossy.
- Bonus Tip: If your tool is made of a material like jade or rose quartz, you can pop it in the fridge for 10-15 minutes before use for an extra cooling and depuffing sensation.
With your skin prepped and glowing with oil, you’re now ready to learn how to do a gua sha facial massage at home with precision and grace.
The Core Techniques: How to Do a Gua Sha Facial Massage at Home, Step-by-Step
Now for the main event! This section will guide you through the fundamental techniques for a comprehensive Gua Sha facial massage. Remember, the key is gentle pressure, consistent upward and outward strokes, and a slight tilt of the tool.
General Principles to Remember:
- Angle: Hold your Gua Sha tool nearly flat against your skin (around a 15-degree angle). This maximizes the surface contact and allows for effective lymphatic drainage and muscle relaxation without excessive pressure.
- Pressure: Use light to medium pressure. You should feel a gentle stretch or a pleasant sensation, but never pain or discomfort. For depuffing, light pressure is enough to move lymph. For muscle tension, you might apply slightly more medium pressure.
- Direction: Always stroke upwards and outwards, moving away from the center of your face and towards your hairline or lymphatic drainage points (like down the neck).
- Repetitions: Perform 3-5 strokes per area.
- Slow & Mindful: This is not a race. Take your time, breathe deeply, and enjoy the sensation.
Let’s Begin Your Gua Sha Journey:
-
The Neck & Décolletage (Your Foundation)
Start here to open up the lymphatic pathways, allowing toxins to drain effectively. This is crucial for overall facial depuffing.
- Downward Strokes (Lymphatic Drainage): Using the large concave edge of your tool, start behind your earlobe and gently glide down towards your collarbone. Repeat on both sides. This helps to guide accumulated fluid down towards your body’s main drainage points.
- Upward Strokes (Firming): With the same large concave edge, start at the center of your collarbone and sweep upwards towards your jawline. This helps to lift and tone the neck area. Repeat on both sides.
-
Jawline & Chin (Sculpting & Releasing Tension)
Often a high-tension area, Gua Sha here can help define your jawline and relax clenched muscles.
- Jawline Definition: Take the small “V” curve of your Gua Sha tool. Place the notch around your chin, with one side of the “V” under your jawbone and the other on top. Gently glide the tool along your jawline, sweeping upwards towards your earlobe. Repeat 3-5 times on each side.
- Chin & Lower Cheek: Use the longer, flatter edge. Place it at the center of your chin and sweep outwards, under your cheekbone, towards your ear. Repeat on each side.
-
Cheeks (Lifting & Depuffing)
Target puffiness and enhance your natural cheekbone structure.
- Under Cheekbone: Using the long curved edge, place it just above your nose and glide outwards, following the line of your cheekbone, all the way to your hairline.
- Over Cheekbone: Flip the tool to a flatter edge. Place it slightly above the previous path, starting near your nose, and sweep upwards and outwards towards your temples.
- Lymphatic Sweep: After each set of strokes on the cheek, gently sweep the tool down from your ear towards your neck to help drain any moved lymph fluid.
-
Under-Eyes (Delicate Care for Puffiness & Fine Lines)
This area requires extreme gentleness. The goal is very light depuffing and circulation boost.
- Depuff & Brighten: Use the smallest, smoothest curve or tip of your tool. Place it at the inner corner of your under-eye area. With almost no pressure (just enough to feel the skin), gently glide the tool outwards towards your temple.
- Be Extra Gentle: The skin here is very thin. If you feel any discomfort, lighten your pressure or skip this area until you’re more comfortable.
-
Eyebrows & Forehead (Smoothing & Tension Release)
Release tension from frowning and smooth out forehead lines.
- Brow Lift: Using the small curved edge, place it at the inner corner of your eyebrow. Gently sweep upwards, following the arch of your brow, and ending at your temple.
- Between Brows (11 Lines): If your tool has a comb edge, gently make small zig-zag motions between your eyebrows to release tension. Alternatively, use a small tip and make short, upward strokes.
- Forehead Smoothing: Use the longer, flatter edge of your tool. Place it just above your eyebrow and sweep upwards towards your hairline. Repeat across your entire forehead.
- Horizontal Lines: For horizontal lines, use a long edge and gently sweep horizontally across your forehead from one temple to the other.
Finishing Touches:
Once you’ve completed all sections, take a final moment to guide any remaining lymph fluid. Use the large concave edge to gently sweep from the center of your forehead, down towards your temples, behind your ears, and then down your neck to your collarbones. This helps ensure everything you’ve moved has a clear path for drainage.
“Gua Sha isn’t just about the physical transformation; it’s a sacred pause. A moment to connect with your body, release what no longer serves you, and embrace the beautiful process of self-care.” – The Contextual Life Editorial Team
Post-Gua Sha Care: Maximizing Your Glow and Benefits
You’ve just completed a deeply beneficial and relaxing facial massage! To ensure you reap the maximum rewards and maintain that fresh, radiant glow, a few post-Gua Sha steps are essential.
Step 1: Hydrate Your Skin
After your Gua Sha massage, your skin is primed to absorb skincare products. Follow up with your favorite hydrating serum, moisturizer, and eye cream. The increased circulation from the massage will help these products penetrate more effectively, locking in moisture and nutrients.
- Tip: Gently press your moisturizer into your skin rather than rubbing, to continue the calming sensation.
Step 2: Sun Protection (If Daytime)
If you’re doing your Gua Sha routine in the morning, always finish with a broad-spectrum SPF. Enhanced circulation can make your skin temporarily more sensitive to the sun, and protecting it is paramount for long-term skin health.
Step 3: Clean Your Gua Sha Tool
This is a non-negotiable step for hygiene. Immediately after use, wash your Gua Sha tool with warm water and a mild soap (a gentle hand soap or face cleanser works perfectly). Pat it dry with a clean cloth.
- Why it’s important: This prevents bacteria from transferring to your skin during your next session and keeps your tool in pristine condition.
- Storage: Store your clean, dry tool in a clean pouch or container, away from dusty surfaces.
Step 4: Consistency is Key
Like any self-care practice, the benefits of Gua Sha are cumulative. You might see an immediate glow and reduction in puffiness, but significant improvements in contouring and tension release come with consistent practice.
- How often: Aim for 2-3 times a week. If you’re particularly puffy or stressed, you can do it daily, but listen to your skin and avoid over-massaging.
- When to do it: Many prefer an evening ritual to unwind and depuff from the day. Others enjoy a morning session to awaken the skin and reduce morning puffiness. Choose what fits best into your routine.
Troubleshooting & Advanced Tips for Your Gua Sha Practice
While learning how to do a gua sha facial massage at home is relatively straightforward, a few common pitfalls can hinder your progress or cause discomfort. Here’s how to avoid them and elevate your practice.
Common Mistakes to Avoid:
- Not Using Enough Oil: This is the number one mistake. Dragging the tool across dry skin creates friction, which can lead to redness, irritation, and even microscopic damage over time. Always ensure a generous layer of oil for smooth glide.
- Too Much Pressure: Facial Gua Sha is gentle. You’re not trying to create deep indentations or pain. Excessive pressure can bruise delicate capillaries, especially around the eyes, or cause discomfort. Light to medium pressure is sufficient to stimulate circulation and lymph.
- Wrong Angle: Holding the tool perpendicular (at a 90-degree angle) to your skin concentrates pressure in one spot, which can be irritating. Always maintain a shallow angle (around 15 degrees) to maximize surface contact and glide.
- Ignoring the Neck: Starting with the neck is crucial. It opens the lymphatic drainage pathways, allowing accumulated fluid and toxins from your face to flow freely. Skipping this step can make your facial massage less effective for depuffing.
- Inconsistent Practice: Gua Sha is a cumulative practice. You’ll see the most significant and lasting results with regular, consistent use, rather than sporadic sessions.
- Using on Active Breakouts: Avoid performing Gua Sha over active acne, open wounds, or highly inflamed skin, as this can spread bacteria and worsen irritation.
Advanced Tips to Elevate Your Practice:
- Listen to Your Skin: Your skin is your body’s largest organ, and it communicates with you. If an area feels particularly sensitive, reduce pressure or skip it for the day. If you notice persistent redness or irritation, re-evaluate your technique or frequency.
- Incorporate into Your Routine: Find a consistent time. For some, it’s a mindful morning ritual to start the day. For others, it’s a calming evening practice to unwind. The consistency is what truly matters.
- Temperature Play: Keep your Gua Sha tool in the fridge for an extra cooling and depuffing boost, especially for morning routines. Some even warm their tool slightly (under warm water, then dry thoroughly) for muscle relaxation, but always test the temperature before applying to your face.
- Targeted Tension Release: For specific knots or areas of deep tension (like the jaw or between the brows), you can hold the tool still on that spot for a few seconds with slightly firmer pressure, then release. This can help “melt” away tension.
- Don’t Forget Your Scalp: If your tool has a comb edge, gently comb through your scalp. This can stimulate blood flow to hair follicles, promote relaxation, and relieve tension in the head.
By understanding these nuances and consistently practicing with intention, your journey to mastering how to do a gua sha facial massage at home will not only transform your skin but also become a cherished ritual of self-care and mindfulness.
Learning how to do a gua sha facial massage at home is more than just adding another step to your beauty routine; it’s an invitation to a deeper, more mindful connection with yourself. In a world constantly vying for our attention, carving out a few moments for this ancient, yet wonderfully modern, practice can be a powerful act of self-love.
From the moment you choose your beautiful stone to the gentle, rhythmic strokes across your skin, Gua Sha offers a sanctuary of calm. You’re not just moving lymph or relaxing muscles; you’re cultivating a ritual that empowers you to depuff, de-stress, and rediscover your natural radiance. Imagine starting your day with a brighter, less puffy complexion, or ending it by melting away the day’s tension, all from the comfort of your own home.
Remember, consistency is your greatest ally, and patience is your gentle guide. Don’t seek perfection from day one; instead, embrace the journey of learning, listening to your body, and enjoying the process. Each time you pick up your Gua Sha tool, you’re not just engaging in a beauty treatment; you’re nurturing your well-being, enhancing your inner glow, and affirming your commitment to a more contextual and radiant life. So, go forth, embrace the glide, and let your natural beauty shine through.